Tag Archives: vegan

It’s Tomato Time! | Homemade tomato sauce & more!

25 Aug

photo 1

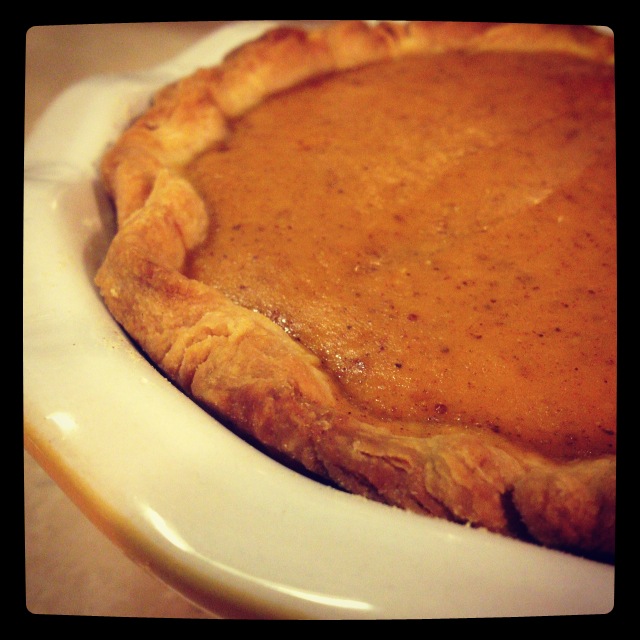
Oh hi there! It’s been a while! Hope your summer has been amazing. It’s so hard to believe that it’s nearly September. Wow! But before I go on and on about how I love the Fall, I’ll share a hint of what we’ve been up to recently—lots of cooking/making with fresh local veggies! Hooray!

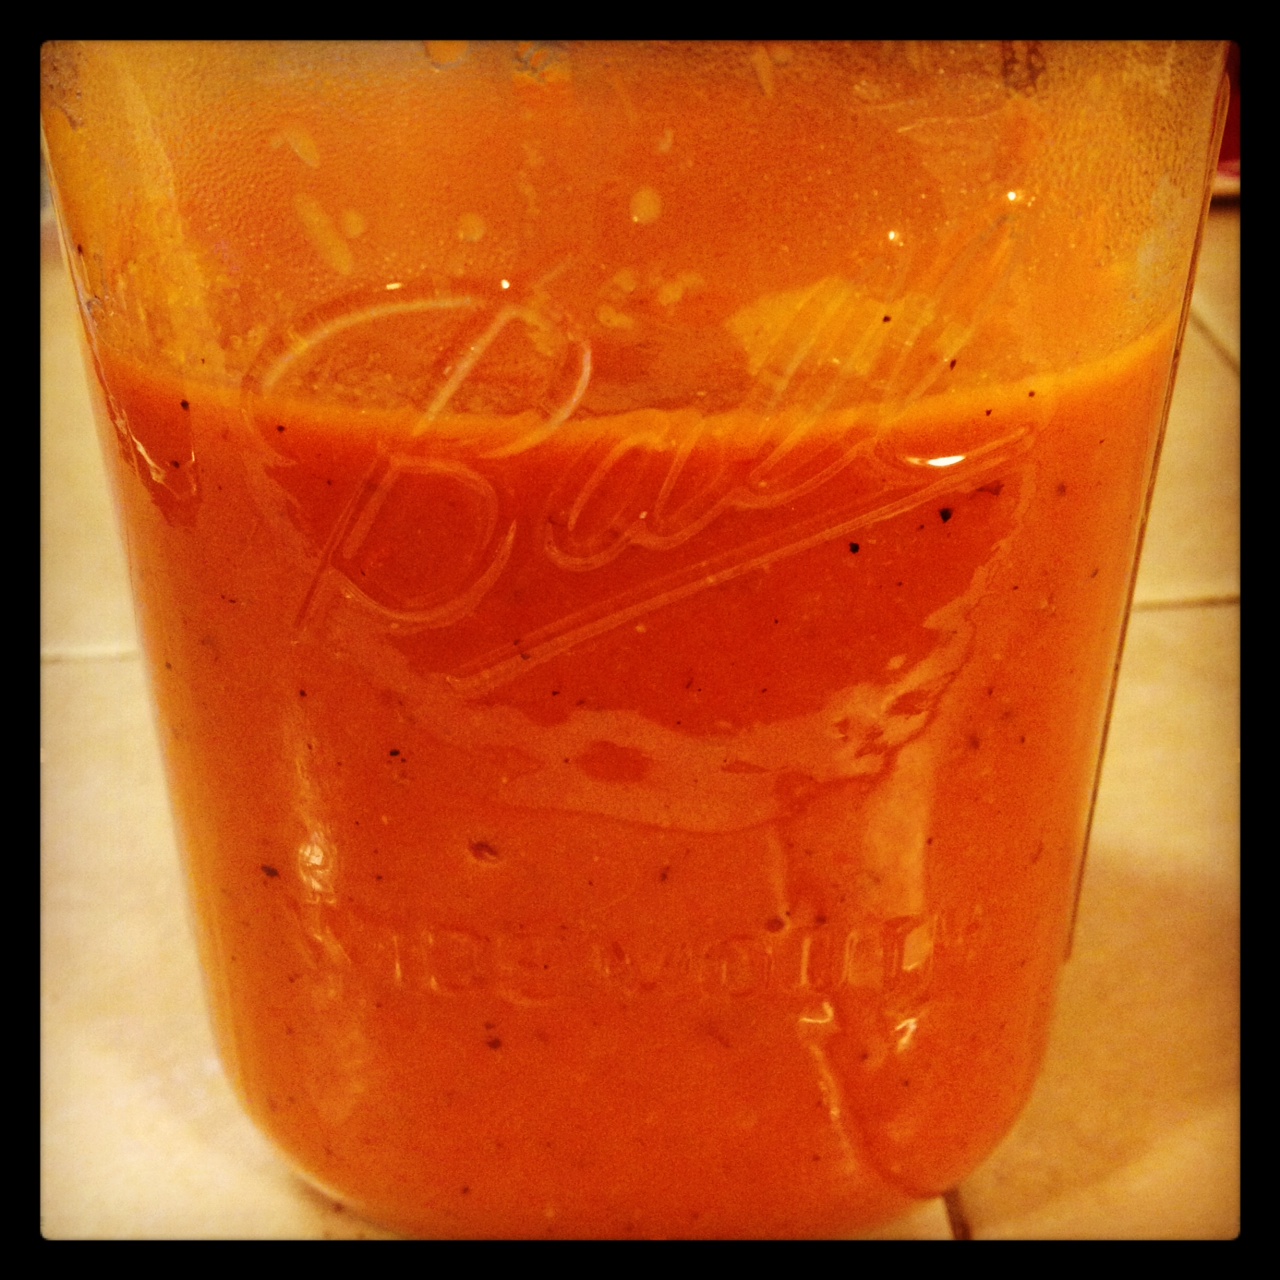
Our amazing 90-year-old neighbor’s son dropped off a bag of tomatoes from her garden and one of our other neighbors (Ollie’s favorite!) invited us to “go shopping” his garden. What a treat! I’ve eaten my share of fresh garden tomatoes this year but this time we’d gotten so many at once and were a bit overwhelmed. So we decided to make our own red sauce.

This recipe is a mostly scaled down version (with a little twist) of the “Big-Batch Summer Tomato Sauce” from America’s Test Kitchen DIY Cookbook. It still made about 3 pints of sauce. We froze some & took some to Ollie’s favorite neighbor but truth be told, I didn’t share any with the other neighbor because she is Italian and I was completely intimidated. I did, however, thank her profusely for the amazing tomatoes the next time I saw her, so don’t worry. 

Also, I’m apologizing in advance for the lack of photos. I took some stellar ones but my phone got completely destroyed (run over by a highway full of cars) and failed to back up that day (Murphy’s Law!). Seriously, people. I know. 

Ingredients

5 lbs of fresh organic tomatoes (in season & garden fresh are the BEST!)
2 Tbsp of tomato paste (we didn’t have any so see how I improvised below)
2 cloves of garlic
1 tsp of organic cane sugar (you could use raw honey or brown sugar, too — or omit it altogether)
2 tsp dried basil (or 2 Tbsp fresh)
1 tsp salt
1 Tbsp of red wine vinegar

Steps

1. Oh crap! = The realization that you don’t quite have all of the ingredients to make what you want to make. What went wrong this time? Well, we didn’t have any tomato paste. I researched a bit online and most sources said to cook down (reduce) tomato sauce. Honestly, we were making 2 other things that night and I didn’t feel like waiting for a can of tomato sauce to reduce on the stovetop BEFORE I could make the tomato sauce. Then I remembered that I had a package of organic sun-dried tomatoes and I found this recipe for Sun-dried Tomato Puree (I followed the recipe exactly but omitted the garlic cloves & recommended additions because I wanted to keep it simple since I was adding it to a sauce recipe. I also don’t think I used quite as much olive oil as the 1/2 cup in the recipe when all was said & done).

2. Bring 4 quarts of water to boil in a large pot over high heat and prepare an ice bath (ice & cold water) in a large bowl. Remove core from tomatoes and score a small X in the base of each. In batches, with a slotted spoon, lower tomatoes into boiling water & cook just until skins are loose, about 15-45 seconds. Using a slotted spoon, transfer tomatoes to the ice bath to cool (about 2 minutes). Take tomatoes out of the ice bath and remove loosened tomato skins (they will fall right off like magic!). 

3. Process garlic in a food processor until minced, about 10 seconds. Leave the garlic in the food processor.  Process peeled tomatoes, in batches, until almost smooth, 15-20 seconds. It’s okay that your garlic got a little more processed in the first batch of tomatoes. They’re all going to hang out together in step 4 anyway. Transfer each batch of pureed tomatoes to a large pot (we used a dutch oven). 

4. Add the garlic, sun-dried tomato puree (substituted for the tomato paste), basil and salt to the tomatoes and bring to simmer over medium heat. Continue to cook, stirring occasionally, until sauce has thickened and reduced by 1/2  (about 1.5-2 hours). Stir vinegar and sugar into pot, seasoning with additional sugar to taste. Season with salt and pepper to taste.

5. You could easily can the sauce, but we opted to pour it into pint size mason jars & freeze what we knew we wouldn’t give away or eat in a couple of days.

Notes

This sauce was really tasty and fresh! While it took a while to make a lot of that time was simmering time (read: time when you can be doing lots of other things!).

It was the perfect recipe to use all of the fresh tomatoes that we’d never have eaten in time.

If you don’t like tomato seeds in your sauce (or you have picky kids), consider straining the seeds out before pouring the finished sauce into mason jars…or better yet…cut each tomato in 1/2 and scoop the seeds out with your thumb after step 2 above. 

Advertisement

Meet My New Obsession | Homemade Almond Milk

18 Apr

photo 1

Lately, I’ve been the Queen of Unfinished blog posts—so many ideas, so little time. Ugh. Apologies, dear friends!

I’m sharing this recipe with you because I can’t stop making it (or singing its glorious praises). Homemade almond milk. Yes. DO IT! I have friends who’ve been making it for years and I wondered what all of the buzz was about…until…

I participated in a detox last September under the guidance of Simply Inspired Wellness. To call it a detox sounds a bit extreme but this program is about re-setting your systems and ridding your body of toxins that commonly build up with the consumption of processed foods, alcohol, caffeine, etc. It was 100% worth the effort and investment. Afterwards, I felt refreshed, healthier and more educated/aware of what I was putting into my body. Two big post-detox surprises: foods that I didn’t cook at home tasted over salted, and my immediate craving for something sweet after eating a meal, virtually vanished.

The detox was also my true introduction to almond milk. I bought the boxed, unsweetened kind to add to my smoothies and morning coffee. It was a little watery but I didn’t notice it at all in my smoothies. Coffee on the other hand? Well, it was kinda gross—and something about the acidity of the coffee made the almond milk curdle a bit. Ew.

But I digress, it wasn’t until a few weeks ago, that I had homemade almond milk in an iced coffee from a local bakery/cafe. On a menu sign next to the espresso beverages, “house made almond milk” appeared in a lovely hand lettered font. Well, I’m a sucker for anything “house made” so I figured I’d try it. Hi, homemade almond milk, I think I love you. And the rest is history.

It’s certainly a little bit more expensive to make at home, but 100% worth it. It’s super creamy and a little bit naturally sweet (I didn’t sweeten it). It’s delicious in coffee, especially iced. I’ve also been eating it in this breakfast cereal recipe that I make a batch of on Sunday night (just the grains) and take to work for breakfast all week (I add the almond milk, cinnamon, ginger, a pinch of pumpkin pie spice, raw pecans and a little maple syrup).

The first 2 times I made almond milk, I used organic raw almonds (skin on), a blender, cheesecloth and a strainer. It’s a bit messy and a little wasteful (I tossed the cheesecloth when I was finished) but worked fine. I made my most recent batch using a nut milk bag (a bag made of super fine mesh). It was much easier to use, very easy to wash and strained out even the tiniest bits of almond meal (that the cheesecloth & strainer combo missed).

My almond milk keeps in the refrigerator just fine for 5 days or so. I usually double the batch if I plan to use it for things other than my morning coffee. Jess also really likes it too.

And finally…here is the link to the recipe that I used. This blog (theKitchn) is worth perusing—we’ve found some good recipe gems.

Happy making!

photo 2

Happy New Year | A Healthy Start!

19 Jan

photo-7

Holy cow! Happy 2014! Where did all of the days after Thanksgiving 2013 go? Wheeee!

After lots of yummy, and well worth it in a homemade-coconut-cream-pie-kind-of-way, holiday eating & baking & giving, we’re back on a healthier eating track. A friend recommended a healthier food blog to Jess and we’ve started flipping through all of the wonderful cookbooks (old & new) on our bookshelves for inspiration–with the interwebs a finger’s length away, it’s easy to rely solely on them web for meal planning even though we’ve got a wealth of beautifully bound print books close by. One resolution (use what we’ve got!) is well underway.

Here are the two things we’ve (ahem…Jess) has made so far from Sarah Britton’s blog, My New Roots. The Winter Abundance Bowl (recipe here) and these little gems (Spaghetti Squash Baby Cakes with Crispy Sage). The abundance bowl was insanely good (seriously, it’s a MUST make)–trust the recipe and her cooking process AND the fact that everything tastes amazing together (a bite of this with a bite of that) with all of the the different textures. Oh hi, pumpkin seed sauce! Where have you been all my life? It would be a delicious dip for veggies, too.

We adapted the squash baby cakes recipe because every store we went visited was out of spaghetti squash (seriously, not a single one). Jess used butternut squash instead and didn’t include the fried sage leaves on top & they were still delicious and sage-y. She cooked some of the cakes in a skillet and then baked the rest. The leftover cakes heated up really well in the toaster oven. I don’t love butternut squash and I happily ate these up.

I’m really excited to explore the other recipes on My New Roots and share our experience with you.

We had what seemed like a million carrots in the refrigerator so I made a really yummy Ginger Apple Carrot Soup from Joy the Baker’s blog one Sunday afternoon. 

Ok. It wouldn’t be a good food related post without ending on a yummy sweet treat that I’ve made several times since discovering the recipe. Available here (but I’ve shared the recipe below so I can include my tips/process notes). It makes four servings and even though you’ll be tempted to eat more…don’t do it–it’s really rich.

photo-6

Chocolate Ricotta Mousse from Real Simple
Serves 4

Ingredients

1 15-ounce container ricotta (about 2 cups)
2 tablespoons confectioners’ sugar
1/2 cup semi sweet chocolate, melted, plus more, shaved, for topping (I used these mini chocolate chips and then just sprinkled a few on top)

Directions

  1. In a food processor, blend the ricotta and sugar until smooth.
  2. Add the melted chocolate and blend until thoroughly mixed in (should be a smooth chocolate color with no visible white).
  3. Divide among bowls and top with the shaved chocolate.
  4. The mousse can be refrigerated until ready to serve, up to 2 days. The original recipe says to bring it up to room temperature before serving — but we like it a little more chilled so I usually toss in into the refrigerator after making it for 30 minutes or so.

Maker’s notes:
There were several comments on the original recipe that said it had a very grainy texture. Mine wasn’t at all–quite the opposite actually. I attribute this to 2 things.

  1. A great (but not insanely expensive) food processor. We have this Cuisinart that I found online on sale for $99. I don’t care that it’s white and doesn’t look super modern & sleek. It’s an amazing kitchen work horse.
  2. Really good quality whole milk ricotta (I know I’ve mentioned it before, but Calabro is my favorite & we buy it at Whole Foods). It’s creamy &  blends up very nicely. It’s so tasty, that I’ve been known to eat it straight from the carton with a little bit of salt & pepper. Oops!

What healthy and delicious recipes have you been making in 2014?

Makin’ Pies | A Thanksgiving Recap

4 Dec

“It’s not far I can walk down the block to Table Talk
Close my eyes make the pies all day
Plastic cap on my hair I used to mind now I don’t care
I used to mind now I don’t care ’cause I’m great” – Patty Griffin

Me and my grandparents circa 1982. I think.

Me and my grandparents circa 1982. I think.

When I was little my grandfather used to tell me this story of one of the first jobs he had as a kid. He would go into local stores and look for mold on all of the Table Talk pies that they were selling. His job was to take a little pocket knife and scrape the mold off of the bottom crust and place the pie back on the shelf. It was the depression and totally indicative of the times and the spirit of that era.

Why all this talk about pies and making pies.. well I made several different versions of pumpkin pies for Thanksgiving and wanted to share some recipes, links and love. Kate thinks I am crazy, and often calls me a baking renegade. Thanksgiving week was no different. I decided to make four pies this year, one to keep and the rest to give away. They were all pumpkin based, one traditional, a vegan option, and even a gluten-free paleo friendly option! Now you get the picture. For real.

twopies

The traditional pumpkin pies were for my family and for the staff that volunteered to work Thanksgiving morning at Bloc, one of the cafes I manage. This had a buttermilk and butter crust and Kate’s Dad’s pumpkin pie filling recipe. The results… amazing! The crust was evenly browned and crisp and never got soggy even after chilling in the fridge overnight!

The crust recipe is from Joy the Baker’s blog and it is her Dad’s Perfect Pie Crust recipe.
Here’s the link: Dad’s Sweet Potato Pie

I don’t want to share Denny’s exact pumpkin pie filling recipe here, so I have found a similar vintage pumpkin pie recipe that will do the trick.
Carnation’s Famous Pumpkin Pie from 1959 (hint: leave out the cloves in the recipe)
Notes:
– I made the crust in the food processor and it still came out amazing
– I didn’t have buttermilk on hand, so I made my own with 1/3 c whole milk and 1/3 tsp cider vinegar
– I had extra pie crust & filling since I used recyclable pie tins for my lucky pie recipients, so I made a mini pie for Kate & I 🙂

extrafilling

Next up…Vegan Mini Pies, delivered swiftly to the folks that volunteered to work at Diesel on Thanksgiving morning! The crust is made from coconut oil, not shortening and is soy free. It remained very light in color, but yielded a very sturdy, yet flaky crust. I found this recipe on a blog that is amazing and super cute, Loves and Lemons, it was the complete recipe, the author provided.

Again, I made the crust in the food processor, no kneading or hand cutting in the fat for me! The only change I made was that I used canned coconut milk instead of almond milk in the filling, because it is what I had on hand.
Mini Vegan Pumpkin Pies

veganmini

Lastly, a recipe I had been wanting to try out since the first Fall leaf hit the pavement. Paleo Pumpkin Cashew Cheesecake from Paleo Fondue. One word Y-U-M! Kate isn’t even a fan of cheesecake and she loved this recipe. In typical Jess fashion I did make a substitution. I thought the unsweetened coconut crust that she used in her recipe was too “healthy” for my liking at the time, so I made my own crust recipe up:

Gluten Free Ginger Snap Crust
makes enough for a 9″ spring form pan

3/4  package of Mi-Del Gluten Free Ginger Snaps
1 TBS melted virgin coconut oil
pinch of all natural sea salt

1) Pulse ginger snaps and salt in a food processor until evenly sized crumbs are created, graham cracker cust

2) Once ginger snaps are processed, add the coconut oil and pulse until crumbs look evenly coated with oil and wet

3) Coat the bottom of your spring form pan with the crumbs and evenly press the layer, ensuring that the mixture goes about 1 inch up the sides of the pan

4) Place pan on a baking sheet and bake crust in a 350 degree oven for 8-10 mins, check frequently you don’t want your crust to burn. You are just baking the crust enough to set it.

5) Cool crust completely then refrigerate while you make the cheesecake filling.

pumpcheesecake

Notes:
– In the photo above I made coconut whipped cream, using chilled canned full fat coconut milk and powdered sugar.

There you have it, our Thanksgiving recapped in pie recipes. You should try all of them, but if that is too overwhelming, just take my advice and bake at least one of the recipes above. It will be worth it.


Got Bananas? | Two New Recipes That Are B-A-N-A-N-A-S!

1 Dec

We’ve gotten into this habit of buying bananas and forgetting about them until they are just on the brink of almost too ripe. Ugh. While I like them riper than I did in my childhood days, there’s a point where they are just to sweet for eating plain & are perfect for adding to oatmeal or topping a piece of toast with almond or peanut butter. This past summer, they couldn’t get overripe fast enough–I loved peeling, breaking them into quarters or thirds and tossing in a ziplock bag in the freezer for morning smoothies. YUM! But now I feel as though they stack up in the fridge, almost black, waiting for us to take the time to transform them into some delicious baked good.

I usually love going back to old favorites but I was in the mood for something new so I broke in Dorie Greenspan’s “Baking: From my home to yours” book that I got Jess for her birthday (oops!) and baked her Cocoa-Nana Bread–perfect for bringing into work. I also wanted something a little healthier that I knew we could safely keep around the house for us to enjoy. Enter iambaker‘s Chocolate Chip Banana Bars. Oh hi!

Needless to say, it was a perfect banana filled Sunday of baking.

First, the decadent-it’s-okay-to-eat-chocolate-for-breakfast recipe.

the lighting in our kitchen makes the bread look reddish but it was actually very very dark brown

the lighting in our kitchen makes the bread look reddish but it was actually very very dark brown

Cocoa-Nana Bread from Dorie Greenspan’s Baking: From my home to yours

Ingredients
2 cups all-purpose flour

1 cup unsweetened cocoa powder
1 1/2 teaspoons baking powder
1/2 teaspoon salt (we use sea salt)
1/4 teaspoon baking soda
1 stick unsalted butter, at room temperature
3/4 cup sugar (we use raw sugar)
1/2 cup (packed) light brown sugar
2 large eggs
2 ripe bananas, mashed
3/4 cup buttermilk (tip: if you don’t have buttermilk on hand, just add 1 tsp of vinegar to 1 cup of milk, stir & let sit for a few minutes)
1/2 cup store-bought chocolate chips

Steps
1. 
Center a rack in the oven & preheat the oven to 350 degrees (F). Butter a 9×5 inch loaf pan and place it on an insulated baking sheet–or on two regular baking sheets stacked one on top of the other. (This extra insulation will keep the bottom of the bread from over baking.)

Maker’s notes: And it did! This incredible tip transforms the way I’ll bake other quick breads from now on. There is nothing more frustrating than taking your labor of love out of the oven with either a raw center or burned outside just so the bread could bake all the way through. I used 2 baking sheets stacked & it worked perfectly.

2. Sift together the flour, cocoa, baking powder, salt & baking soda.

3. Working with a stand mixer fitted with a paddle attachment (I just used a hand mixer because I didn’t feel like dragging out the KitchenAid), in a large bowl, beat the butter at medium speed for about a minute until softened.

4. Add the sugars and beat for another 2 minutes. Add the eggs one at a time, beating for a minute after each addition. At this point, the batter may look a little curdled–it’s okay.

5. Reduce the mixer speed to low and mix in the mashed bananas.

6. Add the dry ingredients in 3 additions, mixing only until they disappear into the batter.

7. Still on low speed, add the buttermilk, mixing until it is incorporated.

8. Stir in the chocolate chips and scrape the batter into the pan.

9. Bake for 30 minutes. Cover the bread loosely with a foil tent to keep the top from getting too dark, and continue to bake for another 40-45 minutes (total baking time = between 70-75 minutes), or until a thin knife inserted into the center comes out clean.
Maker’s notes: Covering the bread with a foil tent is another really amazing tip that will change the way I bake future quick breads! The top came out perfectly and not overdone in the least bit.

10. Transfer the pan to a rack and cool for at least 20 minutes before running a knife around the edges of the bread and unmolding it. Invert and cool to room temperature right-side-up.

11. Store wrapped in plastic at room temperature and the bread will stay fresh for about 2 days. Tightly wrapped, it will keep up to 2 months in the freezer.

The verdict
Tasty! The loaf is really pretty–it baked nice & high with impressive cracks. The flavors were more developed the next day. It’s definitely chocolatey but you can still taste the banana. I’d love to try making a bread pudding with it because I think it would be super yummy dusted with powered sugar and topped with homemade whipped cream for dessert.

Next…the healthier sweet treat that would be a fun recipe for the kids to help make.

Chocolate Chip Banana Bars (Paleo) by iambaker

I followed iambaker’s recipe exactly so I’m not going to repost the recipe here but rather link to it here. Her photos are perfectly mouth watering! Check it out.

The verdict
I like her philosophy & skepticism (about Paleo “baking”) and was encouraged to try these due to the fact that she is a baker who typically uses all of the traditional  ingredients like flour, eggs, butter, etc. We liked these a lot. They were best right after baking–warm or at room temp–but I was hesitant to store them on the counter because they aren’t baked for very long & are quite dense/moist. So I cut them in the pan & stored them in the refrigerator. I let them come to room temp before enjoying (or warmed them in the toaster oven/microwave). When I make them again, I might use almond flour to add a little extra texture.

Making Breakfast Easy | Pumpkin Spice Oatmeal

23 Nov

Clearly I’m obsessed with pumpkin. I’ve fallen head over heels for the flavors of Fall. Last night my friend Dillan (Instagram handle: dillandigi) posted a photo of an overnight pumpkin oatmeal he was prepping for the morning. This was the inspiration for the recipe that I’m posting here today.

A few weeks ago, when Kate was traveling in Texas for work, I made myself pumpkin oatmeal in the slow cooker. It had good flavor, but it made a ton and the edges got kind of well done. So last night, I was looking online for overnight refrigerated oatmeal recipes, but decided that I might not like the texture, or that they might not be to my liking once heated up (since I didn’t want cold oatmeal this morning). Of course, typical me, I decided to wing a pumpkin oatmeal recipe this morning, inspired by this Choco-Banana-Chia Oatmeal recipe that Dillan posted on his blog in September (it’s especially tasty)!

pumpkinoats

Pumpkin Spice Oatmeal

makes 1 serving

Ingredients

1/2 c Trader Joe’s Gluten Free Rolled Oats
1 c boiling water
1 TBS 100% pure pumpkin puree (not pumpkin pie mix)
1/2 TBS chia seeds
1 tsp organic virgin coconut oil
2 tsp pure maple syrup
1/4 tsp pumpkin pie spice
1 pinch all natural sea salt (fine)
1 TBS organic dried cranberries

1) Add boiling water to the oatmeal and stir. I like my oatmeal a little on the thicker side, so I also microwave the oats and boiling water for 25 seconds, then stir.

2) Add pumpkin, chia seeds, coconut oil, pumpkin pie spice and stir.

3) Top with maple syrup, a pinch of salt and dried cranberries.

4) Enjoy!

Notes:
– Be sure to keep a close eye on your oatmeal in the microwave, if left unsupervised it can overflow & leave a mess.
– If you like your oatmeal unsweetened, omit the maple syrup–or for a less sweet option, reduce the syrup to 1 tsp.
– Feel free to use oats that are not gluten-free, the recipe would work just as well.
– Other delicious toppings would include: sprouted almonds, toasted pecans, or whipped cream.

Another great advantage of this recipe is that it is really healthy and costs almost nothing to make. All of the ingredients included in this recipe were items we had in our pantry–can’t get much better than that! 🙂

Fallin’ for Pumpkin | Vegan Pumpkin Cupcakes with Maple Buttercream

17 Nov

“Don’t you love New York in the fall? It makes me wanna buy school supplies. I would send you a bouquet of newly sharpened pencils if I knew your name and address. On the other hand, this not knowing has its charms.” – You’ve Got Mail


There are many things that I love about Fall. It holds a certain sense of nostalgia for me, a kind of love affair and anticipation of all the things that I love. New England in the Fall all that I have ever known. Memories of being a hooded little version of myself jumping in piles of leaves and making Simon the scarecrow with my Gram. Pumpkin carving, trick or treating, celebrating all of the wonderful Fall birthdays in my family, and favorite Fall foods like acorn squash, pumpkin everything, and apple pies.

As an adult, I have my own traditions built on the life that Kate and I share together. The Halloween costumes remain as well as recipes riddled with pumpkin and fall flavors. The following recipe is one that I made for the annual Diesel Halloween party, it could be made with dairy and it would be just as tasty, as always I like a baking challenge and also try to bake things that all the guests at the party can enjoy!

Vegan Pumpkin Bliss

Vegan Pumpkin Cupcakes with Maple Buttercream

adapted from Vegan Cupcakes Take Over the World

Makes 24 cupcakes

Ingredients

2 c 100% pure canned pumpkin (not pumpkin pie filling)
2/3 c canola oil
2 c organic vegan sugar
1/2 c organic vanilla soy milk
1/2 tsp Bragg’s organic and raw cider vinegar
2 tsp vanilla extract
2 1/2 c all-purpose flour (I use King Arthur Flour)
 1 tsp baking powder
1 tsp baking soda
1 tsp pumpkin pie spice
1/2 tsp all natural fine sea salt

Maple Buttercream

adapted from Wilton’s Classic Buttercream Icing

Yield: generous frosting for 24 cupcakes

Ingredients

1 c Spectrum Non-hydrogenated Vegetable Shortening
1 c Earth Balance Buttery Sticks (softened)
2 tsp vanilla extract
8 c confectioners’ sugar (sifted)
4 TBS organic vanilla soy milk
4 TBS organic maple syrup
pinch of all natural fine sea salt

Cupcake Directions

1) Preheat oven to 350 degrees. Line two muffin pans with cupcake wrappers.

2) In a small bowl combine the soy milk and cider vinegar and let stand for 5 minutes. This will make vegan buttermilk.

3) In a large bowl stir together the pumpkin, canola oil, sugar, vegan buttermilk, and vanilla. Sift in the flour, baking powder, baking soda, pumpkin pie spice and salt. Stir together with a fork, don’t use a mixer it will make the batter gummy.

4) Once combined fill the liners two-thirds full. Bake for 22 to 24 minutes. Rotate cupcake trays at approximately 14 minutes into the total baking time to ensure even baking.

5) Remove cupcakes from pans and transfer to a wire rack and let cool completely before frosting.

Frosting Directions

1) In large bowl, cream shortening and Earth Balance with electric mixer. Add vanilla.

2) Gradually add sugar, one cup at a time, beating well on medium speed. Scrape sides and bottom of bowl often. When all sugar has been mixed in, icing will appear dry.

3) Add soy milk and maple syrup, then beat at medium speed until light and fluffy. Remember to taste the frosting as you are adding the maple syrup, keep adding by the TBS until you achieve your desired taste. If the frosting appears to thick, add more soy milk, but be cautious   and add a little at a time in order to not thin it out too much.

4) Once you have reached the desired consistency, then add a pinch of sea salt and beat just to incorporate. Keep bowl covered with a damp cloth until ready to use.

These cupcakes were a big hit at the party. Kate said that the cake was the best pumpkin cake I’ve ever made, they were super moist and flavorful. You would never know they were vegan. Also, when dreaming up the frosting flavor, Kate doubted my decision to try a maple frosting, remarking that it might not be a flavor combo that appeals to the masses. She voted for a cinnamon buttercream, but I went with my gut and it was amazing.

Notes:
– This recipe could be made non-vegan by substituting butter in for Earth Balance and whole milk for the soy milk.
– An easy way to frost cupcakes is to fill a plastic Ziploc bag with frosting and cut one bottom corner of the bag off. Twist close the top opening of the bag and squeeze some frosting back into the bowl to remove any air pockets. Then start from the center of your cupcake and with even pressure move in a spiral until you fill the cupcake to the edge. Don’t worry if you mess up, just scrape the frosting back into the frosting bowl using a butter knife.

Best Frosting Ever | Nutella Buttercream Atop Chocolate Cupcakes

5 Sep

photo-2 copy

I can’t post this without first acknowledging that it’s been a LOOOONG time since my last post. Phew, so sorry! I promise this hasn’t turned into an orphan blog. She still has loving parents. 🙂 I hope this recipe is well worth the wait (I think it is).

A note about the cupcakes. Yes, they are indeed vegan. Gasp. Your friends, family members, neighbors and co-workers won’t notice. It’s a great recipe to have on hand when you are low on things like butter & eggs but want to make an amazing treat to brighten someone’s day. If you are making these cupcakes for a vegan friend, frost these with a vanilla or coffee “buttercream” (make any standard buttercream recipe but use shortening and/or a vegan “butter” substitute for the butter & soy, almond or coconut milk for the liquid) — sadly the Nutella buttercream recipe that follows the cupcake recipe is not vegan.

Your Basic Chocolate Cupcake 

Recipe credit: Original recipe from “Vegan Cupcakes Take Over the World” baking book — adapted by Jess.

Makes 12 cupcakes (We almost always double the recipe!)

Ingredients

1 cup soy milk (You can use almond milk or if you’re not worried about making these vegan you can also use regular milk or buttermilk. If you use buttermilk, omit the vinegar below.)

1 teaspoon apple cider vinegar

3/4 cup granulated sugar

1/3 cup canola oil

1 and 1/2 teaspoons vanilla extract

1 cup all-purpose flour

1/3 cup cocoa powder, Dutch-processed or regular

3/4 teaspoon baking soda

1/2 teaspoon baking powder

1/4 teaspoon salt

1/2 teaspoon espresso powder (It’s our secret weapon! When added in small amounts to chocolate baked goods, it brings out their chocolately goodness. It can be found in the coffee aisle of most markets and/or specialty stores. It is different from ground espresso as it dissolves completely in water.)

1) Preheat the oven to 350 degrees F and line muffin pan with paper or foil liners.

2) Whisk together the soy milk (or whatever you’ve decided to use*) and vinegar in a large bowl, and set aside for a few minutes to curdle. *You’re basically making “buttermilk” so, again, if you decide to use buttermilk, skip the vinegar & this step.

3) Add the sugar, oil, and vanilla extract to the soy milk mixture and beat until foamy.

4) In a separate bowl, sift together the flour, cocoa powder, baking soda, baking powder, salt, and espresso powder. Add in two batches to the wet ingredients and beat until no large lumps remain (a few tiny lumps are okay).

5) Pour into liners, filling three-quarters of the way. Bake 18-20 minutes, until a toothpick inserted into the center comes out clean (we rotated the pans after 13 minutes).

6) Transfer to a cooling rack and let cool completely before frosting.

Nutella Buttercream Frosting

You don’t have to love Nutella to love this frosting but it’s true, you MUST like a chocolate/hazelnut combo. The frosting is super fluffy & light. The salt is an absolute necessity as it perfectly cuts the sweetness of the Nutella. We use a pastry bag to appropriately gob the frosting on top of each cupcake — and be warned — it’s quite tempting to pile some onto a spoon for eating.  Try to show some restraint, okay?

(Recipe credit: I referenced a few recipes online before mixing & matching & adapting.)

This should frost a layer cake and 12 cupcakes but I usually second guess it and double the recipe (and always end up with leftovers but I’d rather have leftover frosting than be scrambling to make another batch!).

Ingredients

1 stick of unsalted butter, room temperature

1 cup of shortening

2 cups powdered sugar

2/3 cup Nutella (hazelnut spread)

1 teaspoon pure vanilla extract

1/4 tsp salt

2 tablespoons whole milk

1) In a stand mixer, fitted with the paddle attachment, cream the butter, shortening and sugar together on low until well combined. Add the Nutella and increase speed to medium. Beat for two minutes.

2) Add the vanilla and salt, beating for an additional 30 seconds.

3) Last, add the milk and continue to beat for about one minute, or until frosting lightens slightly in both color and texture.

4) Frost cupcakes & enjoy. YUM!

photo-3

Two For One | Shredded Chicken & Enchilada Sauce

28 Jan

Make it count Monday, two recipes in one blog post. My ever thrifty self has been trying to meal plan on my day off and make the majority of our meals at the beginning of the week in order to have stress free healthy meals during the week when work is in full gear.

I’ve been using these simple principles:
– Cook at least one protein in the crock pot. Why you ask? Here are my tips… I can stretch one protein such as pork tenderloin, boneless spare ribs, chicken breasts, steak tips, etc. into about 2 -3 meals for Kate and I. Of course I get creative mainly because I can’t stand having the same thing over and over. One week we had steak tips cooked in the crock pot that we had with mashed sweet potatoes and kale chips, which then turned into asian spiced steak tacos with corn soft tacos and fresh lime juice.
– Save your money! Using the crock pot to cook at least one meal a week will save you money on utilities. One of my favorite crock pot recipe blogs, A Year of Slow Cooking, listed that there is documentation that suggests that a slow cooker uses approximately $0.02 of power per hour and that the monthly cost of using a slow cooker is $1.17. The slow cooking method of crock pots lends itself perfectly to less expensive cuts of meat that can be tough if not cooked using the low and slow method.
– Save your time! I only make slow cooker meals that require little to no prep ahead of time. That means less prep time, less dishes, and more time to spend with Kate and the pups 🙂

This week I made the recipe below originally posted on The Honest Company Blog.

Easiest Slow Cooker Shredded Chicken
serves 4

Ingredients
3 Boneless Skinless Chicken Breasts (fresh or frozen)

1 16oz jar of your favorite salsa
1 onion finely chopped

Steps
1) Pour 1/3 of the jar of salsa covering the bottom of the crock pot

2) Layer the chopped onion over the salsa

3) Nestle the chicken breasts into the onion and salsa that is covering the bottom of the crock pot

4) Cover the chicken breasts with the remaining 2/3 jar of salsa

5) Cover and cook fresh chicken breasts on LOW for 7 hours. If you used frozen chicken breasts cook on HIGH for 6 hours.

Notes:
1) I used fresh chicken breasts and came out amazing, super moist and tender. Yum!
2) The salsa I used was Spike’s Salsa and it was the medium variety, but feel free to use whatever suits your heat level. I discovered Spike’s Salsa one week when it was on sale at the grocery store, it is really good and costs a fraction of the other bigger named salsa brands.
3) I removed the cooked chicken from the crock pot and shredded it using two forks, it basically falls apart on its own so you could use your hands if you want.
4) To store it, I placed the left over shredded chicken in a food safe storage container, we use these Anchor Hocking True Seal glass containers, then I added about 1/2 – 3/4 cup of the reserved cooking juices that were at the bottom of the slow cooker. Only use enough to mix into the shredded chicken to keep it moist.

sauce
Tonight I’m turning the left over shredded chicken into an Enchilada Casserole using a homemade enchilada sauce I made this afternoon.

Here’s the recipe:

Roasted Tomato Enchilada Sauce
inspired by America’s Test Kitchen

Ingredients
1 TBS canola oil

1 14.5oz can of Organic fire roasted diced tomatoes
1 onion diced
3 garlic cloves minced
1 Fresno chile finely diced, seeds and ribs removed
1/2 tsp salt
2 tsp cumin
1 tsp smoked paprika
2 tsp sugar
2 TBS salsa
1/2 c water

Steps

1) Heat oil in a 1.5 – 2 QT sauce pan using med/low heat.

2) Start to cook onion, garlic, and chile in the heated oil to soften about 5 mins.

3) Add remaining ingredients and stir.

4) Bring sauce to a boil and then reduce heat to a simmer.

5) Simmer covered for 15 minutes.

6) Remove pan from heat, using an immersion blender submerge into sauce and blend until smooth. If you do not have an immersion blender a food processor or blender would work just as well.

7) Enjoy!

Notes:
1) The enchilada sauce recipe is totally vegan and low-fat!
2) It will freeze well in a freezer safe storage container, try using a canning jar just remember to leave approximately 1 inch of room in the jar before screwing on the lid.


Summer of Love | Picnic Recipes Galore

25 Jul

Summer is for harvesting garden goodies, hanging out outside — picnics, hammocks, BBQs & early morning outdoor bootcamp — cold brewed coffee, fizzy fruity delights, cooking with farm/our container garden fresh ingredients, crafty endeavors, new friends & romps with the pups. Phew…all that and we’re back in BlogLand with a vengeance!

We celebrated our first anniversary (and 7th year of togetherness!) over the weekend & it was filled with commissioned art (thanks to Nan Lawson, Flowers In May & the fact that paper is a traditional first anniversary gift), yummy food & sentimental goodness (Remember when I wanted a set of these ? Well, Jess surprised me with a vintage 1940’s set in mint condition. *swoon*).

custom illustration by Nan Lawson

custom anniversary illustration by Flowers in May

I had ambitious plans to surprise Jess with a romantic outdoor picnic — filled with smartly designed paper goods, mason jars upon mason jars, yummy food reminiscent of our wedding catering — spread on a handmade little blanket/quilt made out of fabric from our wedding. But I participated in ArtBeat as a craft vendor on Saturday & totally ran out of time (despite planning the picnic menu & starting projects months ahead of time).

my table at ArtBeat! Opal & Ollie Etsy shop opening in August! stay tuned…

So…the weather forecast wasn’t promising & I decided, the morning of, that we’d either eat inside or on the deck. Oh, and, I didn’t finish the blanket but I made really great progress & will finish it one night this weekend. We used an adorable picnic blanket as a tablecloth that our friends Cobi & Sarah gave us as a wedding shower gift. K.I.S.S., right?

Now on to the good stuff!

The menu (with links to recipes & my notes)…

Deviled eggs | Recipe: Mark Bittman (basically your traditional deviled egg recipe: hard boiled eggs, dijon mustard, mayo, S&P) | I topped each with a tiny bit of dill relish instead of paprika.

BLT corn salad lettuce wraps | Recipe: Joy the Baker | This charred corn salad was incredible. I used high quality bacon & oven roasted it. Charring corn in a small apartment kitchen over an open gas burner flame is amazingly fulfilling! I wondered if the corn would actually cook & it did…perfectly! It turned a darker yellow as the kernels crackled & blackened. Mess warning: the stovetop was eat-off-of-it clean before this endeavor & corn shrapnel was everywhere after 3 ears of corn were nicely charred. Well worth it though!

Best berry salad | Recipe: Our very own!

Chocolate yogurt snack cakes | Recipe: Smitten Kitchen | Ah-mazing! I added a teaspoon of espresso powder to the recipe to bring out the depth of chocolatey goodness & dusted the cooled cakes with a little bit of powdered sugar. I’d make them again in a heartbeat. Oh, I had trouble finding whole milk yogurt (weird because I remember seeing it years ago – before the shelves were overflowing with a million brands of Greek style yogurt) so I opted for 2% Swiss yogurt.

Coconut rice pudding with fresh mango | Recipe: Mark Bittman (traditional rice pudding from How to Cook Everything, see very bottom of this post for recipe) | I substituted light canned coconut milk for the cow’s milk. I also added a teaspoon of vanilla extract after the pudding finished cooking. I served it cold with diced fresh mango to mimic the flavors of Jess’s favorite mango sticky rice dessert from a local Thai restaurant.

Home-brewed Arnold Palmers | Recipe: Tyler Florence | The slushy & bright homemade lemonade makes this drink extra special. Definitely prepare this a few hours ahead of time as all of the components need to be nice & cold. Served up in a mason jar with tiny heart etched in the glass (by yours truly!).

mis en place: chocolate yogurt snack cakes

roasting corn!

the spread!

Arnold Palmer with a twist

Rice Pudding (Mark Bittman, How to Cook Everything)

Ingredients:
2 cups water

1 cup long or short-grain rice (I used arborio)
dash salt
2 cups milk (I used canned light coconut milk)
3/4 cup sugar, or more to taste (3/4 cup was plenty for our taste)
1 teaspoon ground cinnamon or cardamom (I skipped the spices because I knew I wanted to top with mango)
1 teaspoon vanilla extract

Steps:
1. Bring the water to a boil in a medium saucepan; stir in the rice and the salt. Cover & cook over low heat until almost all of the water is absorbed, about 20 minutes.

2. Uncover, pour in the milk, and cook, stirring frequently, until about 1/2 the milk is absorbed. Stir in the sugar and spices and continue to cook until the rice is very soft and the milk absorbed. About halfway through the cooking, taste and add more sugar if necessary. 
3. Spoon into custard cups and serve warm or cold, garnished with whipped cream. I served it topped with diced fresh mango. 

This keeps well for 2 days, or more, covered and refrigerated. Serves 8.

%d bloggers like this: