Paying it forward | Let’s do this!

19 Apr

mom&dad

About a year ago, I started initiating random acts of kindness in memory of my mom, Annie. I wrote about the start of the project for my company’s blog series on inspiration. I had every intention of documenting these acts to inspire others, but life got the best of me and I found myself falling behind on the “documentation” part. What truly matters is that lots of happy little things happened and I can only hope that my kindness sparked others to do the same — encouraging a humble trail of human kindness in memory of my mom.

I only intended to do it for a year, but I’ve decided to continue this little project in her memory indefinitely — because the world needs a little extra kindness.

Since tomorrow, April 20th, marks 15 years since she left this earth, I’d like to encourage you all to help me spread some human kindness. You don’t have to make a grandiose or expensive gesture (though you certainly can!). I believe that small acts folded into our “every day” behavior often make the biggest impact.

So tomorrow, when you’re going about your usual business, DO SOMETHING unexpectedly kind. If you’re so inclined, please share it on Instagram with @lovelikeannie or tag your post #lovelikeannie.

To kick things off tomorrow, I’ve left a gift card with a balance at the counter of Diesel Cafe in Davis Square (a local business that’s very near and dear to my heart) that I hope helps a few strangers begin their day with a free coffee/treat and a smile.
What kindness will you spark?

xo
Maker

Another Year! | Keeping it Clean in 2015

31 Dec


photo-2As I rise out of the wrapping paper debris and general holiday craze and settle in to enjoy a few days off (without any big obligations), I decided that I should get back to posting here.

In the spirit of a fresh start in 2015, I’ve set out to tackle a few household projects that have been looming over my head for the last few months. The biggest? Cleaning the inside of the oven. We cook a lot in our rental oven and are great about keeping the outside spotless (seriously, it looks brand new) but the inside…well that’s another story. Last year, I began a search for a less toxic way to clean the oven (most oven cleaners contain a bunch of harsh chemicals). I kinda gave up for a bit after striking out online & in local stores.

And then Jess found this post by one of our favorite bloggers. It worked like magic using items we already had in our pantry (baking soda and white vinegar). Seriously! I didn’t have to scrub much but be prepared to get on your knees & climb into the oven for an hour or so.

My tips:
1) Clean the bottom drawer/broiler last (I cleaned it first and had to clean it again because it got bits of baking soda paste in it as I was wiping out the oven) — I just washed it in the sink but I wished that I’d done it once at the end versus 2x.
2) Use a dish cloth or soft cleaning rag that you won’t mind throwing out afterwards. (I could’ve tossed the one I used in the laundry but it was a plain white flour sack towel that had seen better days to begin with so I didn’t feel guilty about throwing it away.)
3) The baked on spatter on the oven window didn’t budge…at all. The Kitchn also has a post about this and recommends a Norwex cleaning product. Hmmm, I might have to investigate.

On another note related to cleaning insides…mine…holiday treats and time off at home without a good post-holiday vacation grocery shopping have me feeling kinda ick. It’s not so much a New Year’s resolution. Rather it comes out of a need to get back to basics and pay more attention to what I’m eating — basically my body is telling me that it needs healthier stuff. I’ve thought about doing a cleanse (I’ve had good luck with “clean eating” cleanses in the past). I’m halfway through the book about Whole30 “It Starts With Food”. It’s super educational but I’m not sure it’s for me. I also saw this in our recent copy of Bon Appetit and thought it seemed like a good option. Ah, options! In the meantime, I’ve got almonds soaking for homemade almond milk (for smoothies) and I added some sautéed kale to my leftover pad thai lunch today. Things are looking up.

Have any cleaning tips or healthy eating favorites to share? Tell us!
Wishing you and yours an awesome start to 2015!

xo

It’s Tomato Time! | Homemade tomato sauce & more!

25 Aug

photo 1

Oh hi there! It’s been a while! Hope your summer has been amazing. It’s so hard to believe that it’s nearly September. Wow! But before I go on and on about how I love the Fall, I’ll share a hint of what we’ve been up to recently—lots of cooking/making with fresh local veggies! Hooray!

Our amazing 90-year-old neighbor’s son dropped off a bag of tomatoes from her garden and one of our other neighbors (Ollie’s favorite!) invited us to “go shopping” his garden. What a treat! I’ve eaten my share of fresh garden tomatoes this year but this time we’d gotten so many at once and were a bit overwhelmed. So we decided to make our own red sauce.

This recipe is a mostly scaled down version (with a little twist) of the “Big-Batch Summer Tomato Sauce” from America’s Test Kitchen DIY Cookbook. It still made about 3 pints of sauce. We froze some & took some to Ollie’s favorite neighbor but truth be told, I didn’t share any with the other neighbor because she is Italian and I was completely intimidated. I did, however, thank her profusely for the amazing tomatoes the next time I saw her, so don’t worry. 

Also, I’m apologizing in advance for the lack of photos. I took some stellar ones but my phone got completely destroyed (run over by a highway full of cars) and failed to back up that day (Murphy’s Law!). Seriously, people. I know. 

Ingredients

5 lbs of fresh organic tomatoes (in season & garden fresh are the BEST!)
2 Tbsp of tomato paste (we didn’t have any so see how I improvised below)
2 cloves of garlic
1 tsp of organic cane sugar (you could use raw honey or brown sugar, too — or omit it altogether)
2 tsp dried basil (or 2 Tbsp fresh)
1 tsp salt
1 Tbsp of red wine vinegar

Steps

1. Oh crap! = The realization that you don’t quite have all of the ingredients to make what you want to make. What went wrong this time? Well, we didn’t have any tomato paste. I researched a bit online and most sources said to cook down (reduce) tomato sauce. Honestly, we were making 2 other things that night and I didn’t feel like waiting for a can of tomato sauce to reduce on the stovetop BEFORE I could make the tomato sauce. Then I remembered that I had a package of organic sun-dried tomatoes and I found this recipe for Sun-dried Tomato Puree (I followed the recipe exactly but omitted the garlic cloves & recommended additions because I wanted to keep it simple since I was adding it to a sauce recipe. I also don’t think I used quite as much olive oil as the 1/2 cup in the recipe when all was said & done).

2. Bring 4 quarts of water to boil in a large pot over high heat and prepare an ice bath (ice & cold water) in a large bowl. Remove core from tomatoes and score a small X in the base of each. In batches, with a slotted spoon, lower tomatoes into boiling water & cook just until skins are loose, about 15-45 seconds. Using a slotted spoon, transfer tomatoes to the ice bath to cool (about 2 minutes). Take tomatoes out of the ice bath and remove loosened tomato skins (they will fall right off like magic!). 

3. Process garlic in a food processor until minced, about 10 seconds. Leave the garlic in the food processor.  Process peeled tomatoes, in batches, until almost smooth, 15-20 seconds. It’s okay that your garlic got a little more processed in the first batch of tomatoes. They’re all going to hang out together in step 4 anyway. Transfer each batch of pureed tomatoes to a large pot (we used a dutch oven). 

4. Add the garlic, sun-dried tomato puree (substituted for the tomato paste), basil and salt to the tomatoes and bring to simmer over medium heat. Continue to cook, stirring occasionally, until sauce has thickened and reduced by 1/2  (about 1.5-2 hours). Stir vinegar and sugar into pot, seasoning with additional sugar to taste. Season with salt and pepper to taste.

5. You could easily can the sauce, but we opted to pour it into pint size mason jars & freeze what we knew we wouldn’t give away or eat in a couple of days.

Notes

This sauce was really tasty and fresh! While it took a while to make a lot of that time was simmering time (read: time when you can be doing lots of other things!).

It was the perfect recipe to use all of the fresh tomatoes that we’d never have eaten in time.

If you don’t like tomato seeds in your sauce (or you have picky kids), consider straining the seeds out before pouring the finished sauce into mason jars…or better yet…cut each tomato in 1/2 and scoop the seeds out with your thumb after step 2 above. 

Banana Pup Cups | Let’s Celebrate!

1 Jun

ollieskate

Ollie turns five tomorrow and that’s cause to celebrate! He’s our favorite little clown, who loves to sing, still suckles his “Precious” fleece toy, bounces like a little jumping bean when he sees his favorite humans, and he always has time for a good bum scratch!

We adopted him when he was just 13 weeks old, a puppy mill rescue with a special back foot. He has been a great side kick for Stevie and keeps us all laughing!

In honor of his birthday I created a frozen dog treat recipe, which was really easy to make and only has four all-natural ingredients!

bananapupcups

Banana Pup Cakes
makes 7 frozen treats

Ingredients

2 – ripe bananas
1 – 4 oz container of unsweetened applesauce 
1/2 cup of buttermilk
1/4 tsp cinnamon

Steps

1. Mash ripe bananas in a medium size bowl with a fork.

2. Add remaining ingredients and combine using a spatula.

3. Place cupcake liners in a muffin pan.

4. Spoon the batter into the muffin pan, filling cups a generous half full. (I got 7 frosty treats out of my batter.)

5. Place in the freezer, our treats were frozen solid in 2 hours.

Notes

  • These treats are great for pups with allergies, Stevie is intolerant to all things poultry, they are vegetarian, wheat, and soy free.
  • If you have difficulty removing the frozen treats from the muffin pan, just flip the pan over and run warm water on it for a few seconds.
  • The cupcakes wrappers are easy to remove and just peel off, no need for non-stick spray.
  • If you are running out of room in your freezer, 6 of these treats fit in a loaf pan, and would save space.

Stevie & Ollie approved!

Meet My New Obsession | Homemade Almond Milk

18 Apr

photo 1

Lately, I’ve been the Queen of Unfinished blog posts—so many ideas, so little time. Ugh. Apologies, dear friends!

I’m sharing this recipe with you because I can’t stop making it (or singing its glorious praises). Homemade almond milk. Yes. DO IT! I have friends who’ve been making it for years and I wondered what all of the buzz was about…until…

I participated in a detox last September under the guidance of Simply Inspired Wellness. To call it a detox sounds a bit extreme but this program is about re-setting your systems and ridding your body of toxins that commonly build up with the consumption of processed foods, alcohol, caffeine, etc. It was 100% worth the effort and investment. Afterwards, I felt refreshed, healthier and more educated/aware of what I was putting into my body. Two big post-detox surprises: foods that I didn’t cook at home tasted over salted, and my immediate craving for something sweet after eating a meal, virtually vanished.

The detox was also my true introduction to almond milk. I bought the boxed, unsweetened kind to add to my smoothies and morning coffee. It was a little watery but I didn’t notice it at all in my smoothies. Coffee on the other hand? Well, it was kinda gross—and something about the acidity of the coffee made the almond milk curdle a bit. Ew.

But I digress, it wasn’t until a few weeks ago, that I had homemade almond milk in an iced coffee from a local bakery/cafe. On a menu sign next to the espresso beverages, “house made almond milk” appeared in a lovely hand lettered font. Well, I’m a sucker for anything “house made” so I figured I’d try it. Hi, homemade almond milk, I think I love you. And the rest is history.

It’s certainly a little bit more expensive to make at home, but 100% worth it. It’s super creamy and a little bit naturally sweet (I didn’t sweeten it). It’s delicious in coffee, especially iced. I’ve also been eating it in this breakfast cereal recipe that I make a batch of on Sunday night (just the grains) and take to work for breakfast all week (I add the almond milk, cinnamon, ginger, a pinch of pumpkin pie spice, raw pecans and a little maple syrup).

The first 2 times I made almond milk, I used organic raw almonds (skin on), a blender, cheesecloth and a strainer. It’s a bit messy and a little wasteful (I tossed the cheesecloth when I was finished) but worked fine. I made my most recent batch using a nut milk bag (a bag made of super fine mesh). It was much easier to use, very easy to wash and strained out even the tiniest bits of almond meal (that the cheesecloth & strainer combo missed).

My almond milk keeps in the refrigerator just fine for 5 days or so. I usually double the batch if I plan to use it for things other than my morning coffee. Jess also really likes it too.

And finally…here is the link to the recipe that I used. This blog (theKitchn) is worth perusing—we’ve found some good recipe gems.

Happy making!

photo 2

Cleaning House | Minimalist Challenge Musings

16 Mar
a few of the "things"

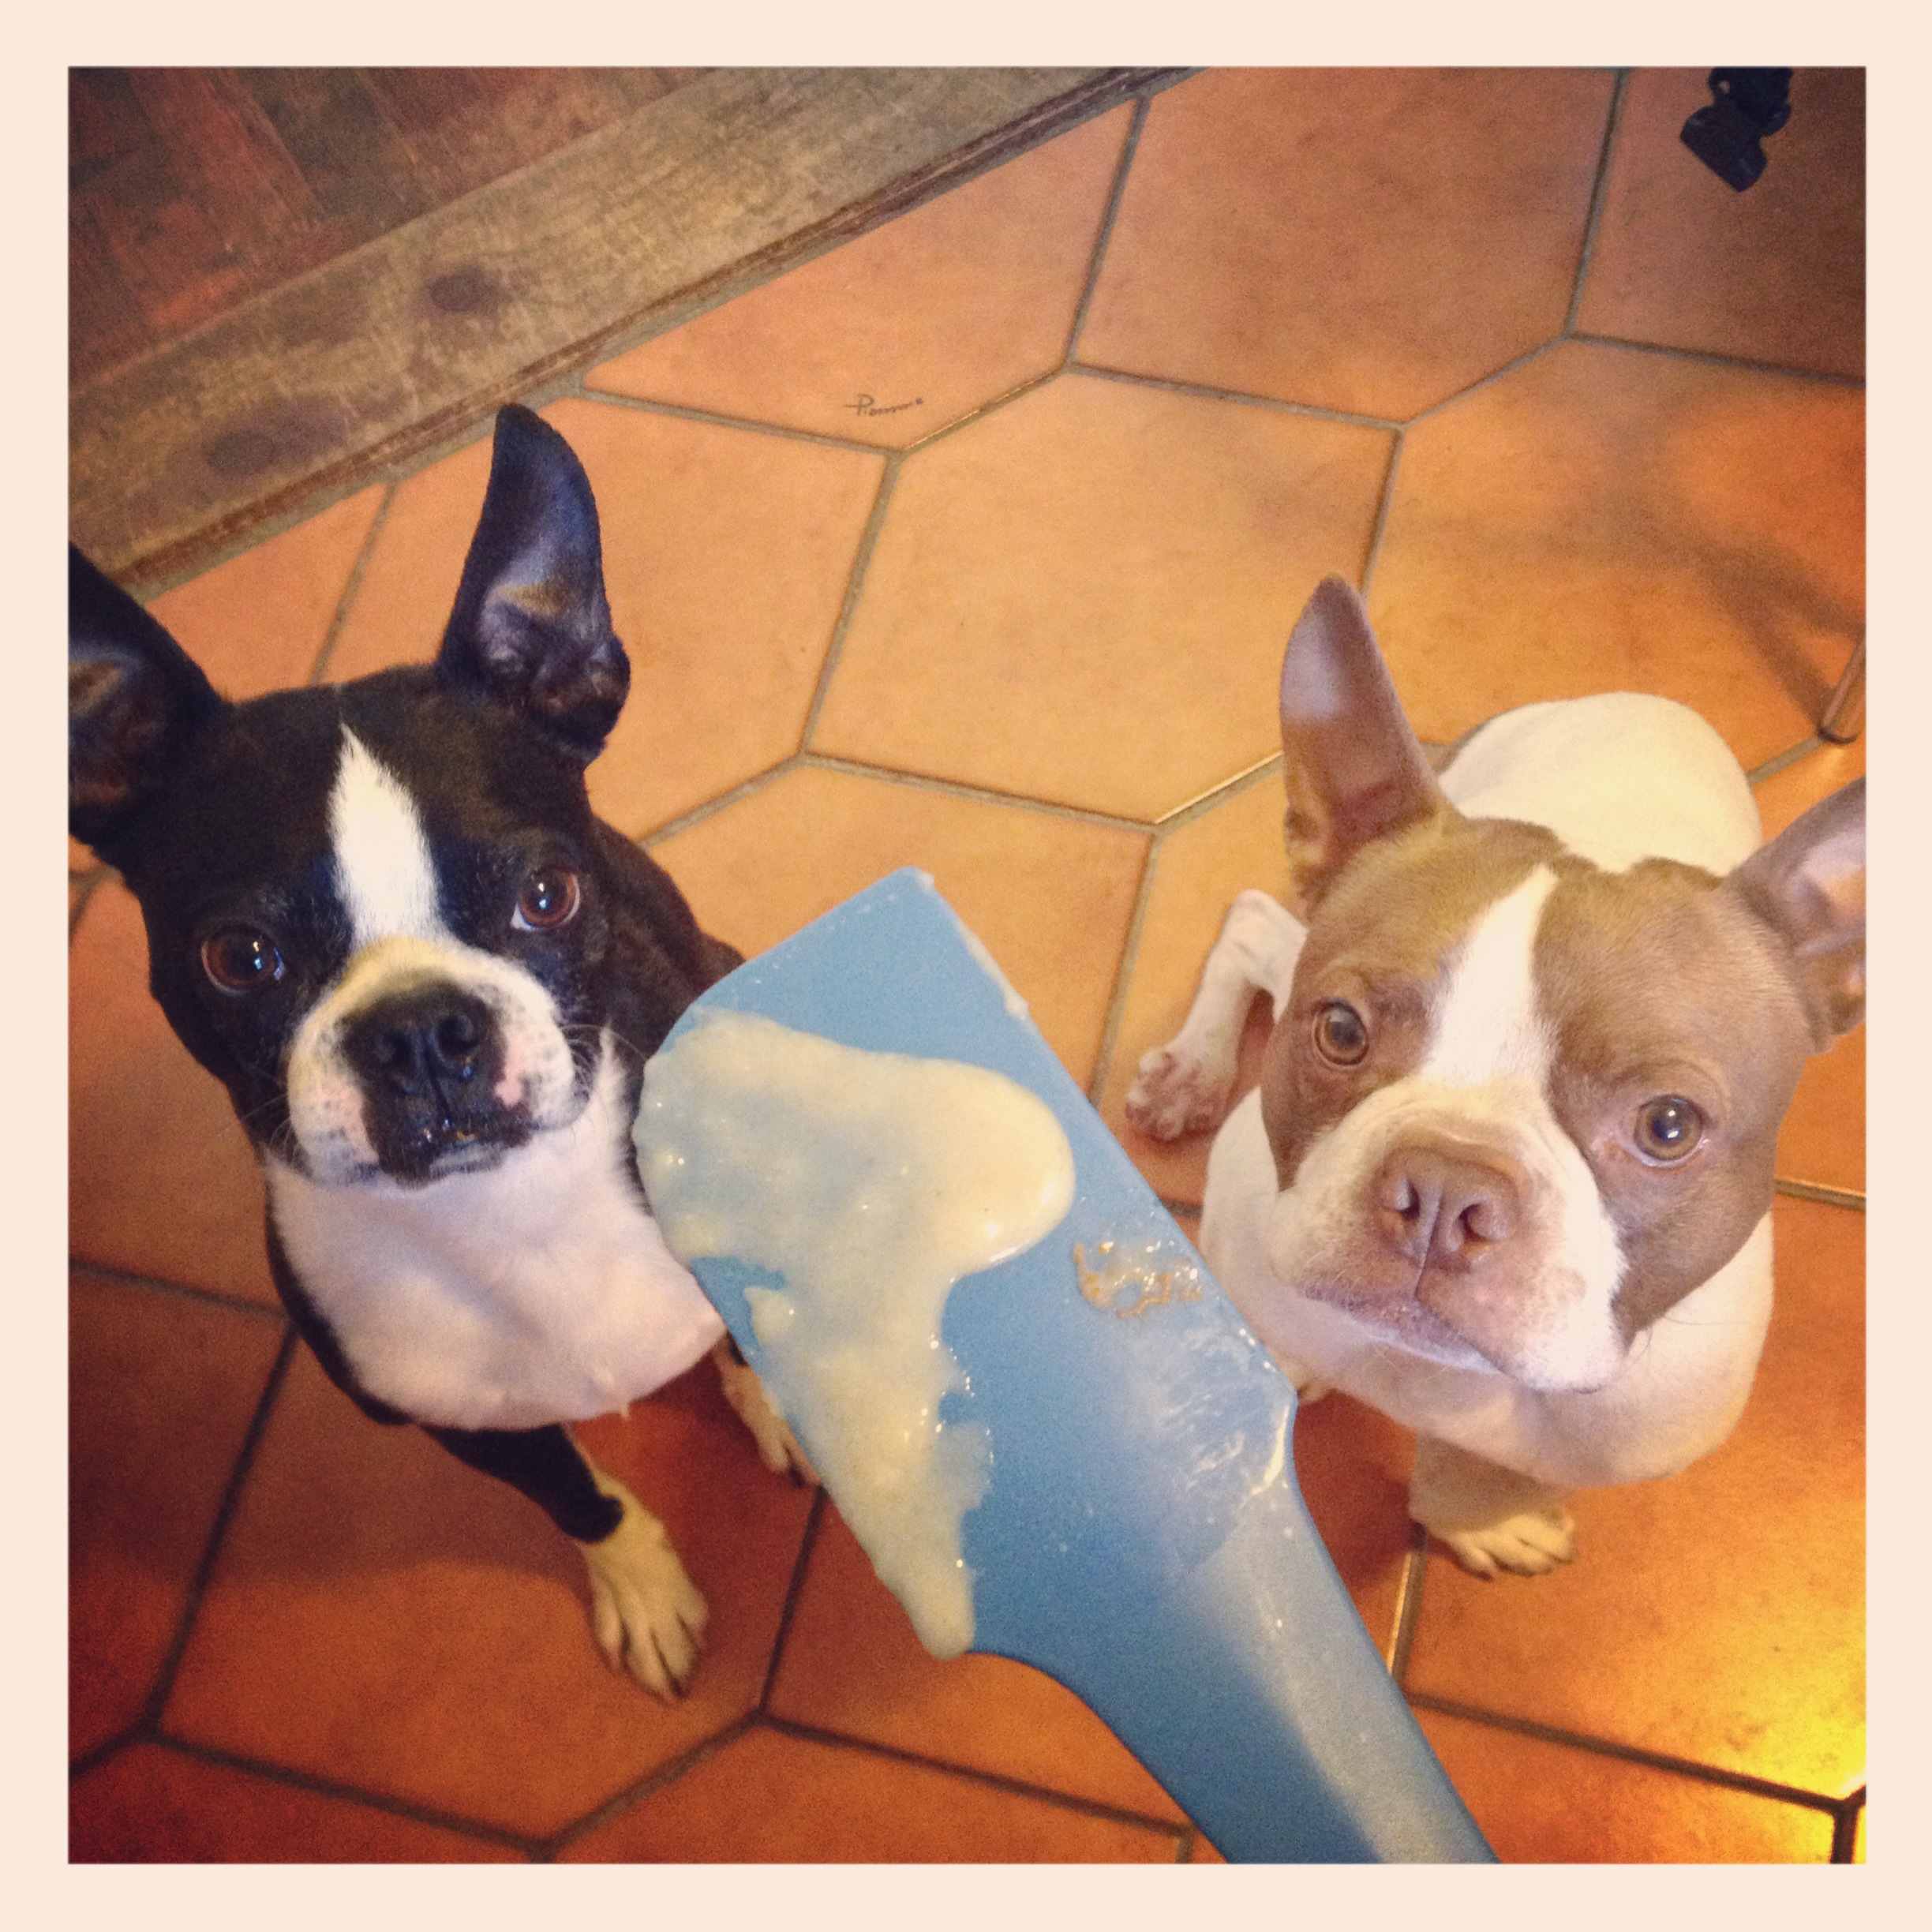
(yes, even the dogs participated in the minimalist challenge & got rid of some of their damaged toys)

The challenge…
Inspired by this post on one of my favorite blogs, I took the “minimalist challenge” after reading more about it and these cool guys, the Minimalists. The challenge, in short, instructs you get rid of one thing on the first day of the month, two things on the second day, three on the third, and so on. Donate, sell or toss–each material possession must be out of your house by midnight each day.

From February 1 through February 28, I got rid of precisely 406 “things” (quite positively even more, because in all honesty, once I started, I couldn’t stop). Oh and by “things”, I mean actual things, not 406 beads and spools of thread. I counted multiple items of the same kind as “1 thing”. I photo documented it on Instagram @katedwyer. Realistically, in the last 2 weeks of the challenge, I lagged behind a little bit (because it was hard to keep up during the week). I didn’t let it get the best of me and approached the weekends with a list of areas to tackle next.

Let me tell you, there is something profoundly therapeutic and about taking a moment, or precisely 406 of them, to pause, re-assess, categorize and move on.

The purge…
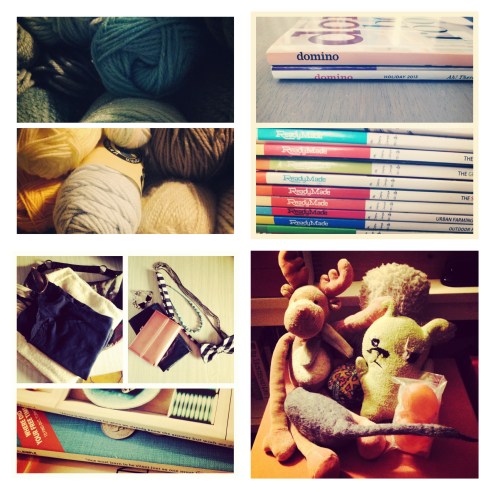
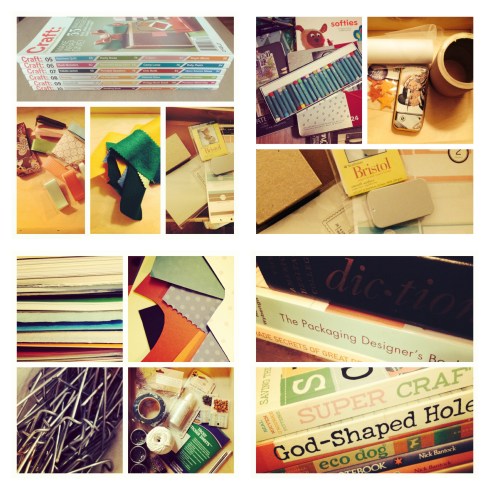
In just 28 days, I gave away bags of fabric and yarn to friends, mountains of art/craft supplies to a another friend who’s an art teacher, donated a ½ dozen bags of items to GoodWill, shredded 2 large shopping bags worth of old bills/financial documents, recycled 3 more bags of old documents and scraps of paper, sold $100 in out-of-print magazines & vintage craft items on eBay and another $100 in clothing & accessories to a 2nd hand clothing store in my neighborhood.

I sorted, purged, cleaned, and reorganized. But I didn’t just haphazardly sort & toss, I THOUGHT about it all as I went along.
Why did I buy that dress­ and wear it only once?
What made me buy 3 of those cute little change purses?
Why haven’t I worn this sweater yet?
Why did I buy that ______ (paper, yarn, fabric, etc.)?
Why am I waiting until I’m “smaller” to wear these jeans again when they aren’t even in style anymore?
Why did I get everything for that [insert crafty endeavor] project and never start or finish it?
Why am I stashing all of these little items away to give as gifts?
Am I hanging onto these rusty floral pins because they were part of  my mom’s craft stash?
And so on…

 Here’s what I learned…
I have a horrible weakness for textile/fiber supplies. I have even less control if we’re talking vintage items, y’all. I had more fabric, felt and yarn than I’d ever realistically use. Sure, I could hold onto them & knit sweaters for penguins but well, would I ever get around to that? Oh yeah, and I’d have to learn how to knit. 

I love a good bargain to a fault. It’s led me down a path of buying something I don’t love because it’s “so marked down” and a slippery slope of purchasing too many art/craft supplies that I won’t ever use. I do this less often now, but I also used to buy lots of these “amazing bargains” to stash away for future gift giving.

I am very sentimental. Material things are material things and unless it’s an heirloom item or something truly meaningful, I have to learn to let go. I shouldn’t buy something because it reminds me of my mom­–I have amazing memories instead.

 It’s okay…I’m an artist. Hoarding under the guise of resourcefulness, while a very common trait of most artists, is not worth the stress (financial, physical, spatial, etc.) it may cause in the long run.

I shouldn’t keep anything in my life that I don’t love. In my experience over the last month, I’m mostly referring to material things but there’s certainly a much bigger take-away here (the Minimalists talk about this very thing on their blog). Surround yourselves with only the things and people you love. Life is too short to be smothered, physically or emotionally, by anything or anyone you don’t adore.

Moving on…
In the last 2 weeks, I’ve continued to go through all of the little nooks and crannies of our apartment with a “minimalist eye”. If it’s not something I’d want to pack up & take with me tomorrow if we moved, I more often than not, get rid of it. It’s also made me be a smarter/leaner shopper. I’ve resisted clearance items and kept an unwavering focus on quality over quantity. I’d much rather one quality, well made, pair of shoes than 3 cheaper versions. 

So friends, there you have it. For 28 days, I recycled, tossed, sold, shredded, gifted and ended up more empowered to embrace change than when I started this journey on February 1. I realize this may sound a bit melodramatic, but all of that “stuff” had truly taken over little spaces in my life and frankly, it feels amazing to have a little extra breathing room.

 There’s plenty of time left in 2014 for you to take the “minimalist challenge” and I enthusiastically encourage you. Everyone has a basement, closet, corner, bookshelf, dresser, cabinet, shoebox, or drawer of stuff just begging for this challenge. Go YOU!

Image


Happy New Year | A Healthy Start!

19 Jan

photo-7

Holy cow! Happy 2014! Where did all of the days after Thanksgiving 2013 go? Wheeee!

After lots of yummy, and well worth it in a homemade-coconut-cream-pie-kind-of-way, holiday eating & baking & giving, we’re back on a healthier eating track. A friend recommended a healthier food blog to Jess and we’ve started flipping through all of the wonderful cookbooks (old & new) on our bookshelves for inspiration–with the interwebs a finger’s length away, it’s easy to rely solely on them web for meal planning even though we’ve got a wealth of beautifully bound print books close by. One resolution (use what we’ve got!) is well underway.

Here are the two things we’ve (ahem…Jess) has made so far from Sarah Britton’s blog, My New Roots. The Winter Abundance Bowl (recipe here) and these little gems (Spaghetti Squash Baby Cakes with Crispy Sage). The abundance bowl was insanely good (seriously, it’s a MUST make)–trust the recipe and her cooking process AND the fact that everything tastes amazing together (a bite of this with a bite of that) with all of the the different textures. Oh hi, pumpkin seed sauce! Where have you been all my life? It would be a delicious dip for veggies, too.

We adapted the squash baby cakes recipe because every store we went visited was out of spaghetti squash (seriously, not a single one). Jess used butternut squash instead and didn’t include the fried sage leaves on top & they were still delicious and sage-y. She cooked some of the cakes in a skillet and then baked the rest. The leftover cakes heated up really well in the toaster oven. I don’t love butternut squash and I happily ate these up.

I’m really excited to explore the other recipes on My New Roots and share our experience with you.

We had what seemed like a million carrots in the refrigerator so I made a really yummy Ginger Apple Carrot Soup from Joy the Baker’s blog one Sunday afternoon. 

Ok. It wouldn’t be a good food related post without ending on a yummy sweet treat that I’ve made several times since discovering the recipe. Available here (but I’ve shared the recipe below so I can include my tips/process notes). It makes four servings and even though you’ll be tempted to eat more…don’t do it–it’s really rich.

photo-6

Chocolate Ricotta Mousse from Real Simple
Serves 4

Ingredients

1 15-ounce container ricotta (about 2 cups)
2 tablespoons confectioners’ sugar
1/2 cup semi sweet chocolate, melted, plus more, shaved, for topping (I used these mini chocolate chips and then just sprinkled a few on top)

Directions

  1. In a food processor, blend the ricotta and sugar until smooth.
  2. Add the melted chocolate and blend until thoroughly mixed in (should be a smooth chocolate color with no visible white).
  3. Divide among bowls and top with the shaved chocolate.
  4. The mousse can be refrigerated until ready to serve, up to 2 days. The original recipe says to bring it up to room temperature before serving — but we like it a little more chilled so I usually toss in into the refrigerator after making it for 30 minutes or so.

Maker’s notes:
There were several comments on the original recipe that said it had a very grainy texture. Mine wasn’t at all–quite the opposite actually. I attribute this to 2 things.

  1. A great (but not insanely expensive) food processor. We have this Cuisinart that I found online on sale for $99. I don’t care that it’s white and doesn’t look super modern & sleek. It’s an amazing kitchen work horse.
  2. Really good quality whole milk ricotta (I know I’ve mentioned it before, but Calabro is my favorite & we buy it at Whole Foods). It’s creamy &  blends up very nicely. It’s so tasty, that I’ve been known to eat it straight from the carton with a little bit of salt & pepper. Oops!

What healthy and delicious recipes have you been making in 2014?

Simple Side Dish | Sriracha Honey Glazed Carrots

6 Dec

carrots

Since my Sriracha roasted brussels sprouts post was so popular, here is another really simple side dish recipe. How simple you ask? You are just three ingredients closer to tasty town. Y-E-S!

Sriracha Honey Glazed Carrots
serves 2

Ingredients

 1 lb organic whole carrots (cleaned, peeled and cut into circles)

1 TBS cold pressed olive oil

1 TBS Sriracha (hot chili garlic sauce) 

1 TBS local raw honey

salt and pepper to taste

Steps
1. Preheat oven to 400 degrees

2. Lightly coat a baking sheet with nonstick spray or olive oil
3. Place the prepped carrots in a medium bowl
4. Combine olive oil and Sriracha, pour over carrots, stir to combine, make sure they are coated evenly.
5. Place coated carrots on to the prepared baking sheet in a single layer.
6. Season with salt and freshly ground pepper.
7. Bake 20 – 30 minutes depending on the roast level you desire. Stir carrots half way through to ensure even browning.
8. Remove from oven, while the carrots are still hot place in a bowl and coat with the raw honey.

Notes
1. Sriracha is a sweet hot chili garlic sauce, 1 TBS will give you a slight heat factor, feel free to increase the Sriracha in this recipe to increase the heat!
2. Serve each portion in a vintage bowl. The bowl in the picture is not vintage, but it is cute and made by Marimekko.

Makin’ Pies | A Thanksgiving Recap

4 Dec

“It’s not far I can walk down the block to Table Talk
Close my eyes make the pies all day
Plastic cap on my hair I used to mind now I don’t care
I used to mind now I don’t care ’cause I’m great” – Patty Griffin

Me and my grandparents circa 1982. I think.

Me and my grandparents circa 1982. I think.

When I was little my grandfather used to tell me this story of one of the first jobs he had as a kid. He would go into local stores and look for mold on all of the Table Talk pies that they were selling. His job was to take a little pocket knife and scrape the mold off of the bottom crust and place the pie back on the shelf. It was the depression and totally indicative of the times and the spirit of that era.

Why all this talk about pies and making pies.. well I made several different versions of pumpkin pies for Thanksgiving and wanted to share some recipes, links and love. Kate thinks I am crazy, and often calls me a baking renegade. Thanksgiving week was no different. I decided to make four pies this year, one to keep and the rest to give away. They were all pumpkin based, one traditional, a vegan option, and even a gluten-free paleo friendly option! Now you get the picture. For real.

twopies

The traditional pumpkin pies were for my family and for the staff that volunteered to work Thanksgiving morning at Bloc, one of the cafes I manage. This had a buttermilk and butter crust and Kate’s Dad’s pumpkin pie filling recipe. The results… amazing! The crust was evenly browned and crisp and never got soggy even after chilling in the fridge overnight!

The crust recipe is from Joy the Baker’s blog and it is her Dad’s Perfect Pie Crust recipe.
Here’s the link: Dad’s Sweet Potato Pie

I don’t want to share Denny’s exact pumpkin pie filling recipe here, so I have found a similar vintage pumpkin pie recipe that will do the trick.
Carnation’s Famous Pumpkin Pie from 1959 (hint: leave out the cloves in the recipe)
Notes:
– I made the crust in the food processor and it still came out amazing
– I didn’t have buttermilk on hand, so I made my own with 1/3 c whole milk and 1/3 tsp cider vinegar
– I had extra pie crust & filling since I used recyclable pie tins for my lucky pie recipients, so I made a mini pie for Kate & I 🙂

extrafilling

Next up…Vegan Mini Pies, delivered swiftly to the folks that volunteered to work at Diesel on Thanksgiving morning! The crust is made from coconut oil, not shortening and is soy free. It remained very light in color, but yielded a very sturdy, yet flaky crust. I found this recipe on a blog that is amazing and super cute, Loves and Lemons, it was the complete recipe, the author provided.

Again, I made the crust in the food processor, no kneading or hand cutting in the fat for me! The only change I made was that I used canned coconut milk instead of almond milk in the filling, because it is what I had on hand.
Mini Vegan Pumpkin Pies

veganmini

Lastly, a recipe I had been wanting to try out since the first Fall leaf hit the pavement. Paleo Pumpkin Cashew Cheesecake from Paleo Fondue. One word Y-U-M! Kate isn’t even a fan of cheesecake and she loved this recipe. In typical Jess fashion I did make a substitution. I thought the unsweetened coconut crust that she used in her recipe was too “healthy” for my liking at the time, so I made my own crust recipe up:

Gluten Free Ginger Snap Crust
makes enough for a 9″ spring form pan

3/4  package of Mi-Del Gluten Free Ginger Snaps
1 TBS melted virgin coconut oil
pinch of all natural sea salt

1) Pulse ginger snaps and salt in a food processor until evenly sized crumbs are created, graham cracker cust

2) Once ginger snaps are processed, add the coconut oil and pulse until crumbs look evenly coated with oil and wet

3) Coat the bottom of your spring form pan with the crumbs and evenly press the layer, ensuring that the mixture goes about 1 inch up the sides of the pan

4) Place pan on a baking sheet and bake crust in a 350 degree oven for 8-10 mins, check frequently you don’t want your crust to burn. You are just baking the crust enough to set it.

5) Cool crust completely then refrigerate while you make the cheesecake filling.

pumpcheesecake

Notes:
– In the photo above I made coconut whipped cream, using chilled canned full fat coconut milk and powdered sugar.

There you have it, our Thanksgiving recapped in pie recipes. You should try all of them, but if that is too overwhelming, just take my advice and bake at least one of the recipes above. It will be worth it.


Got Bananas? | Two New Recipes That Are B-A-N-A-N-A-S!

1 Dec

We’ve gotten into this habit of buying bananas and forgetting about them until they are just on the brink of almost too ripe. Ugh. While I like them riper than I did in my childhood days, there’s a point where they are just to sweet for eating plain & are perfect for adding to oatmeal or topping a piece of toast with almond or peanut butter. This past summer, they couldn’t get overripe fast enough–I loved peeling, breaking them into quarters or thirds and tossing in a ziplock bag in the freezer for morning smoothies. YUM! But now I feel as though they stack up in the fridge, almost black, waiting for us to take the time to transform them into some delicious baked good.

I usually love going back to old favorites but I was in the mood for something new so I broke in Dorie Greenspan’s “Baking: From my home to yours” book that I got Jess for her birthday (oops!) and baked her Cocoa-Nana Bread–perfect for bringing into work. I also wanted something a little healthier that I knew we could safely keep around the house for us to enjoy. Enter iambaker‘s Chocolate Chip Banana Bars. Oh hi!

Needless to say, it was a perfect banana filled Sunday of baking.

First, the decadent-it’s-okay-to-eat-chocolate-for-breakfast recipe.

the lighting in our kitchen makes the bread look reddish but it was actually very very dark brown

the lighting in our kitchen makes the bread look reddish but it was actually very very dark brown

Cocoa-Nana Bread from Dorie Greenspan’s Baking: From my home to yours

Ingredients
2 cups all-purpose flour

1 cup unsweetened cocoa powder
1 1/2 teaspoons baking powder
1/2 teaspoon salt (we use sea salt)
1/4 teaspoon baking soda
1 stick unsalted butter, at room temperature
3/4 cup sugar (we use raw sugar)
1/2 cup (packed) light brown sugar
2 large eggs
2 ripe bananas, mashed
3/4 cup buttermilk (tip: if you don’t have buttermilk on hand, just add 1 tsp of vinegar to 1 cup of milk, stir & let sit for a few minutes)
1/2 cup store-bought chocolate chips

Steps
1. 
Center a rack in the oven & preheat the oven to 350 degrees (F). Butter a 9×5 inch loaf pan and place it on an insulated baking sheet–or on two regular baking sheets stacked one on top of the other. (This extra insulation will keep the bottom of the bread from over baking.)

Maker’s notes: And it did! This incredible tip transforms the way I’ll bake other quick breads from now on. There is nothing more frustrating than taking your labor of love out of the oven with either a raw center or burned outside just so the bread could bake all the way through. I used 2 baking sheets stacked & it worked perfectly.

2. Sift together the flour, cocoa, baking powder, salt & baking soda.

3. Working with a stand mixer fitted with a paddle attachment (I just used a hand mixer because I didn’t feel like dragging out the KitchenAid), in a large bowl, beat the butter at medium speed for about a minute until softened.

4. Add the sugars and beat for another 2 minutes. Add the eggs one at a time, beating for a minute after each addition. At this point, the batter may look a little curdled–it’s okay.

5. Reduce the mixer speed to low and mix in the mashed bananas.

6. Add the dry ingredients in 3 additions, mixing only until they disappear into the batter.

7. Still on low speed, add the buttermilk, mixing until it is incorporated.

8. Stir in the chocolate chips and scrape the batter into the pan.

9. Bake for 30 minutes. Cover the bread loosely with a foil tent to keep the top from getting too dark, and continue to bake for another 40-45 minutes (total baking time = between 70-75 minutes), or until a thin knife inserted into the center comes out clean.
Maker’s notes: Covering the bread with a foil tent is another really amazing tip that will change the way I bake future quick breads! The top came out perfectly and not overdone in the least bit.

10. Transfer the pan to a rack and cool for at least 20 minutes before running a knife around the edges of the bread and unmolding it. Invert and cool to room temperature right-side-up.

11. Store wrapped in plastic at room temperature and the bread will stay fresh for about 2 days. Tightly wrapped, it will keep up to 2 months in the freezer.

The verdict
Tasty! The loaf is really pretty–it baked nice & high with impressive cracks. The flavors were more developed the next day. It’s definitely chocolatey but you can still taste the banana. I’d love to try making a bread pudding with it because I think it would be super yummy dusted with powered sugar and topped with homemade whipped cream for dessert.

Next…the healthier sweet treat that would be a fun recipe for the kids to help make.

Chocolate Chip Banana Bars (Paleo) by iambaker

I followed iambaker’s recipe exactly so I’m not going to repost the recipe here but rather link to it here. Her photos are perfectly mouth watering! Check it out.

The verdict
I like her philosophy & skepticism (about Paleo “baking”) and was encouraged to try these due to the fact that she is a baker who typically uses all of the traditional  ingredients like flour, eggs, butter, etc. We liked these a lot. They were best right after baking–warm or at room temp–but I was hesitant to store them on the counter because they aren’t baked for very long & are quite dense/moist. So I cut them in the pan & stored them in the refrigerator. I let them come to room temp before enjoying (or warmed them in the toaster oven/microwave). When I make them again, I might use almond flour to add a little extra texture.